| Front Strut assembly instructions | |
| Step1. Remove strut assembly from vehicle. Disassemble the strut and spring assembly. (WARNING! Strut assembly is under extreme spring pressure. Use of proper tools and a Spring Compressor is highly recommended). Remove dust cover from strut body. Remove the bump stops. Clean Strut throughly. | 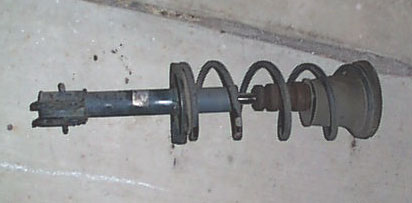 |
| Step 2. Take 2 rubber O-rings and place over the strut body about 3 to 4 inches from the top, and 2 inches apart, (check through all the O-rings to see which one fits your strut body the best. Usually the O-ring that is 3/16 inch thick fits onto most struts). Slide a coil-over sleeve over the strut body/O-ring assembly, (If the sleeve seems too loose, try using the next larger O-ring. If you are using KYB-GR2s, then you will need to wrap the shaft with either duct tape or Electrical tape. 2-3 times around is thick enough.). Slide the sleeve all the way down until the sleeve touches the spring perch of the strut. You may have to push hard to make sure that the sleeve is all the way down and secured onto the spring perch of the strut. Depending on the ride height you want to achieve, the sleeve can go on one of 2 ways. If you wish to have a 2" or lower drop, you will want to put the sleeve on with the screw holes in the up position. If you want less of a drop, you will want to put the sleeve on with the screw holes on in the down position. If you put them on in the down position, you will want to thread the screws in slightly first. |  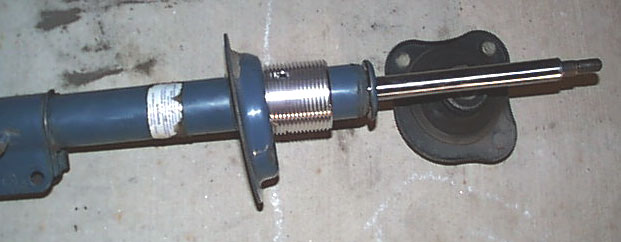 |
| Step 3. Adjust spinning perches about half
way up the threaded sleeve. Then insert and tighten screws evenly
into the sleeve, if you have the screw holes in the up position. Do Not Overtighten!. Depending on the size of your struts, you may need to use the longer screws if your strut housing is smaller.
Place one polyurethane isolator pad on the spring perch, and
then place the correct spring on the sleeve. If you have KYB-GR2 Struts, you will need to remover the bump stop disk or grind it down. It is a lot easier to remove it with a hammer. 2 whacks and the tack welds break really easily. The bump stop disk is not needed with the coilovers as the coilovers will not compress to the point that would cause a metal on metal contact. |
 |
| Step 4. Cut the bump stops in half. Reinstall one of the cut bump stops back onto the strut rod. Place another isolator pad at the bottom of top hat. Then place the billet top hat onto the spring top. Place the original upper mounts/washer onto the top hat. Use the 2 spanner wrenches to lock the spinning perches against each other and reassemble the strut assembly. Install strut assembly back into the vehicle. You will not need to use the spring compressors to do this part. | 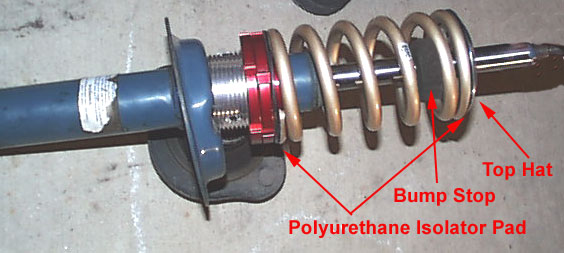 |
| * Repeat steps 1-4 for other front side. | |
| Rear Strut assembly instructions | |
| Step1. You will need to remove the plastic cover for the seat belts in the cargo area first to access the 3 strut bolts. Once removed, remove the 3 strut bolts only. Loosen the lug nuts on the rear tire and raise the rear side of the car. Use a Jack stand and use blocks on the front tire. Remove the rear tire and remove the brake line clip that holds the line onto the strut. Remove strut assembly from vehicle. Disassemble the strut and spring assembly. (WARNING! Strut assembly is under extreme spring pressure. Use of proper tools and a Spring Compressor is highly recommended). Remove dust cover from strut body. Remove the bump stops. Clean Strut throughly. |  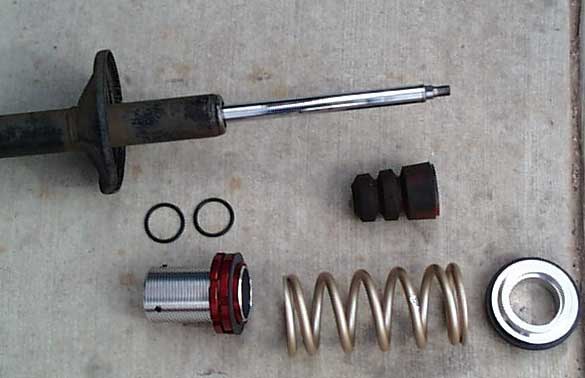 |
| Step 2. Take 2 rubber O-rings and place over the strut body about 3 to 4 inches from the top, and 2 inches apart, (check through all the O-rings to see which one fits your strut body the best. Usually the O-ring that is 3/16 inch thick fits onto most struts). Slide a coil-over sleeve over the strut body/O-ring assembly, (If the sleeve seems too loose, try using the next larger O-ring). Slide the sleeve all the way down until the sleeve touches the spring perch of the strut. You may have to push hard to make sure that the sleeve is all the way down and secured onto the spring perch of the strut. Put them on in the down position(screw holes end on first), you will want to thread the screws in slightly first. Once in position, tighten the screws evenly and Do Not Overtighten!. Depending on the size of your struts, you may need to use the longer screws if your strut housing is smaller. | 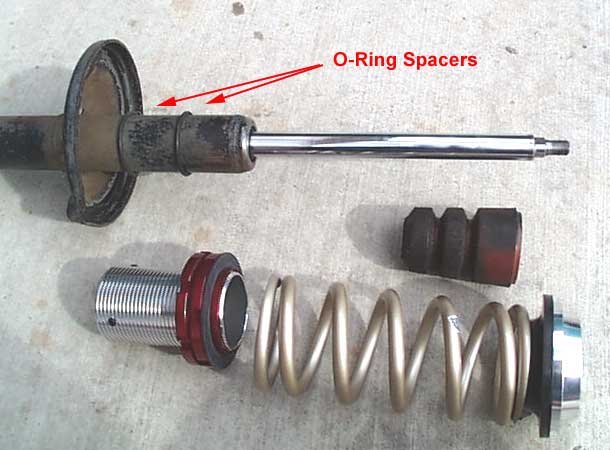 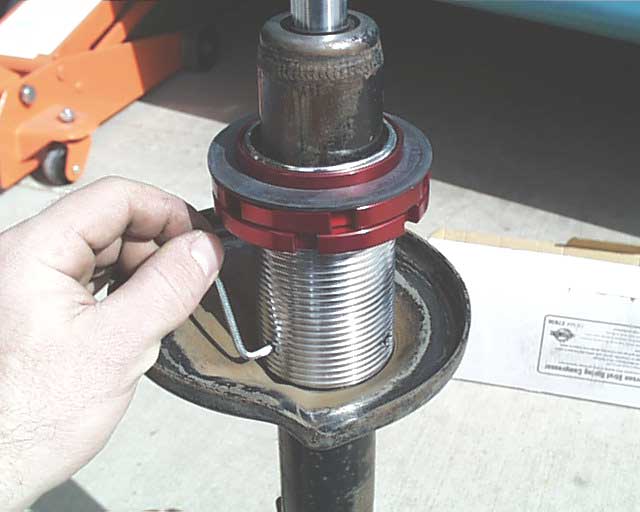 |
| Step 3. Adjust spinning perches so there
is about 1/2" of the threaded sleeve showing at the top.
Place one polyurethane isolator pad on the spring perch, and
then place the correct spring on the sleeve. If you have KYB-GR2 Struts, you will need to remover the bump stop disk or grind it down. It is a lot easier to remove it with a hammer. 2 whacks and the tack welds break really easily. The bump stop disk is not needed with the coilovers as the coilovers will not compress to the point that would cause a metal on metal contact. |
 |
| Step 4. Cut the bump stops in half. Then place the billet top hat rear ring onto the spring top. Reinstall one of the cut bump stops back onto the strut rod. Place the original upper mounts/washer onto the top hat. Use the 2 spanner wrenches to lock the spinning perches against each other and reassemble the strut assembly. Install strut assembly back into the vehicle. You will not need to use the spring compressors to do this part. | 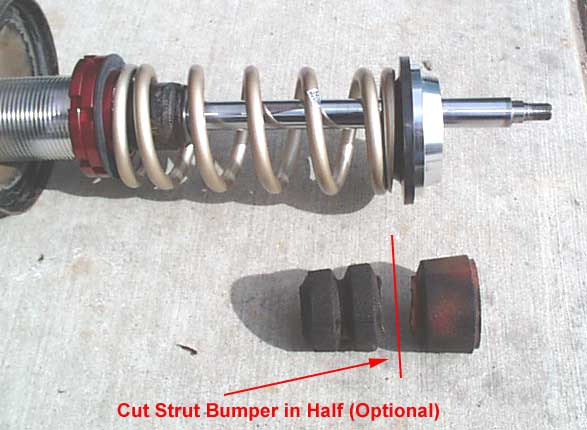  |
| * Repeat steps 1-4 for other rear side. | |
| Coilover Parts Identification | |
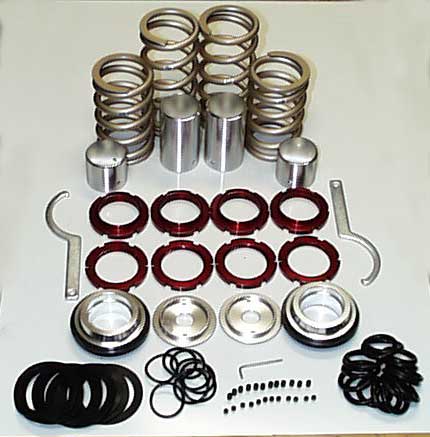 All parts laid out |
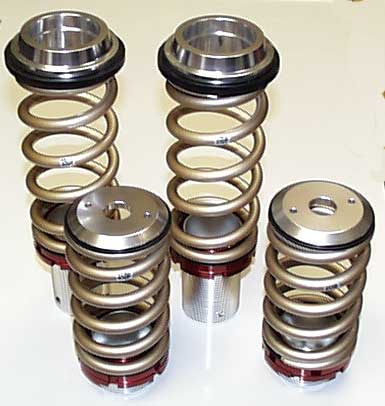 Here is the complete Coilover set fully assembled. |
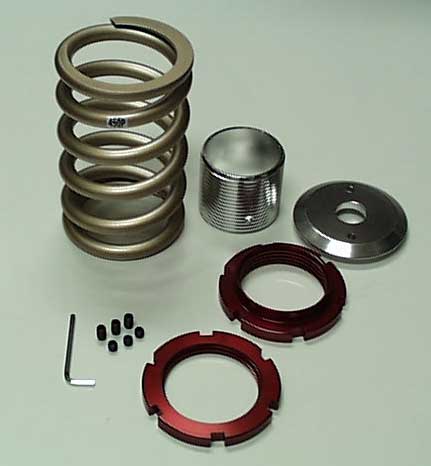 Front Coilover parts |
 Rear Coilover parts |
Polyurethane isolator pad & spring perch |
Polyurethane isolator pad on the spring perch |
Polyurethane isolator pad & Top Hat |
Polyurethane isolator pad on the Top Hat |
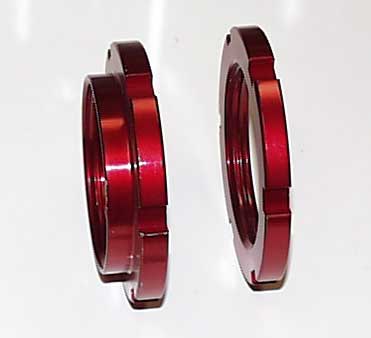 Spring Perch and locking ring |
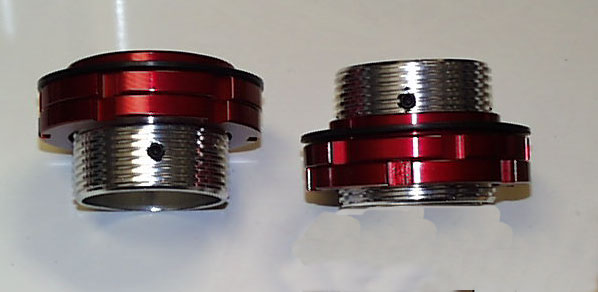 Spring Perch & Locking ring in High Setting(bolts on bottom) Spring Perch & Locking ring in Low Setting(bolts on top) |
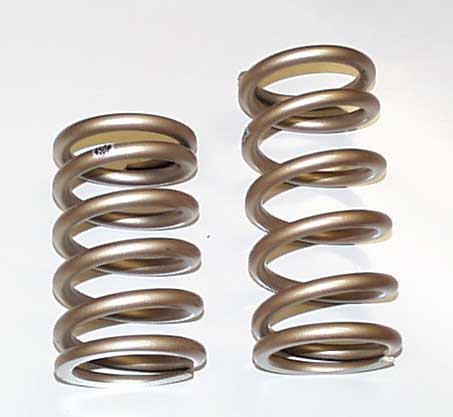 Front String @450lbs. & Rear Spring @350lbs. |
3 sizes of O-Ring spacers, Allen screws, Polyurethane isolator pad |
Disclaimer!A vehicle modified with competition parts may not meet the legal requirements for use on public roads. It is your responsibility to comply with Federal, State, and Local laws prior to vehicle use on public roads.Use or installation of competition parts may also affect or eliminate your insurance coverage. It is your responsibility to determine any change in coverage. There is no warranty stated or implied due to the unusual stress placed on competition parts and/or inability to monitor their modification, installation, or use. The entire risk of quality, performance, or defect is with you, the buyer, and not the manufacturer, distributor or retailer. You assume all the costs of all necessary repairs or service and any consequential damage, cost of charges, or any other liability. Returns are accepted only if the product is in resalable condition. Furthermore, all returns are subject to a 25% restocking charge. We do not guarantee the ride quality of RTR Performance Coil-overs for the following reasons:
|